Want to know how to add Grammarly to Gmail? Here is a detailed guide!
Writing and composing emails can be a stressful job. You might have to check for errors in the spelling and the clarity of the sentences multiple times and still find mistakes at the end.
Adding Grammarly to Gmail can simplify generating and responding to emails. In this article, we have done a step-by-step guide on how to add Grammarly to Gmail. Additionally, we have also covered additional tips for using Grammarly for Gmail.
Let’s dive into the detailed steps!
Table of Contents
How You Can Add Grammarly to Gmail: A Step-by-Step Guide
You can use Grammarly directly in Gmail with the help of the Grammarly extension. You can download extensions for Chrome, Safari, and Firefox. Once it is installed, head over to Gmail and enable Grammarly!
Similarly, you can use Grammarly directly on Gmail via your mobile. You can install Grammarly and enable the Grammarly keyboard when responding or generating an email on the Gmail mobile app.
If you are still confused, here’s a quick step-by-step guide.
Note: We used the Chrome extension methods to add Grammarly to Gmail.
1. Set up the Account
Step 1: Visit Grammarly’s website.

Step 2: Click on Get Grammarly
Step 3: Create an account for Grammarly using the Sign-Up option if you don’t have an existing account
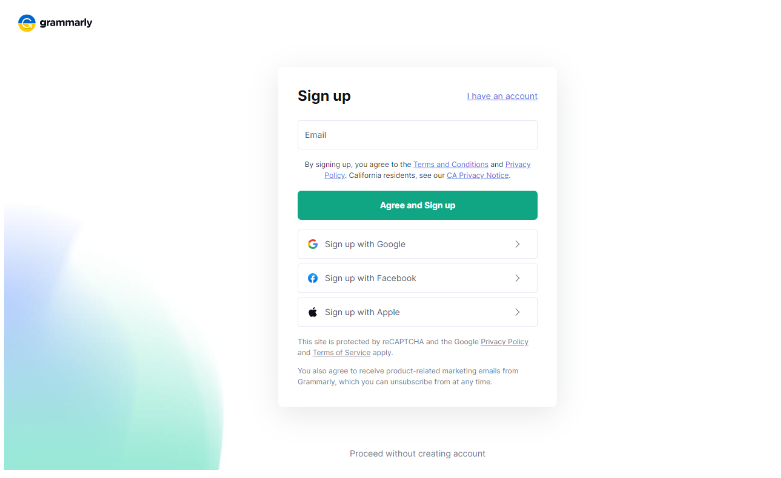
You can sign up using your email or Google, Apple, or Facebook accounts. Also, you can log in from Grammarly’s website if you already have an existing account.
2. Install the Grammarly Extension
Step 1: Once you have logged in, Download Grammarly for chrome from the Apps section by clicking on “Install”.
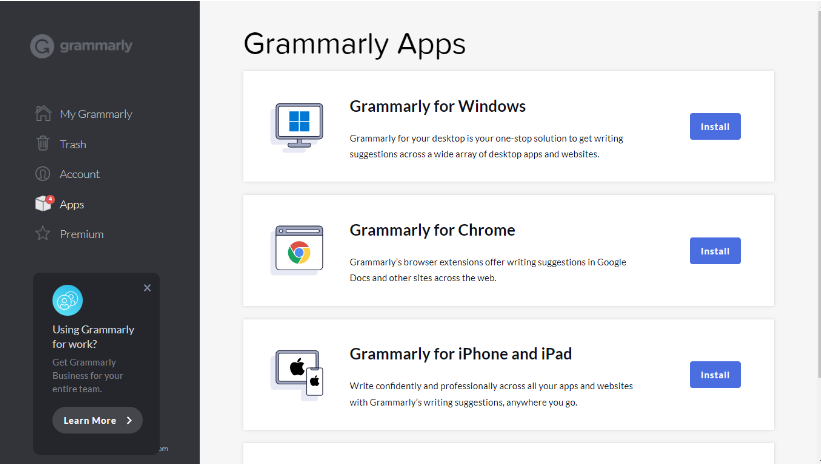
Step 2: Click Allow for all the permission pop-ups to start the installation
Step 3: After installation is complete, Grammarly will be added to chrome extensions
3. Launch Gmail
Step 1: Open Gmail
Step 2: Click on the compose button.
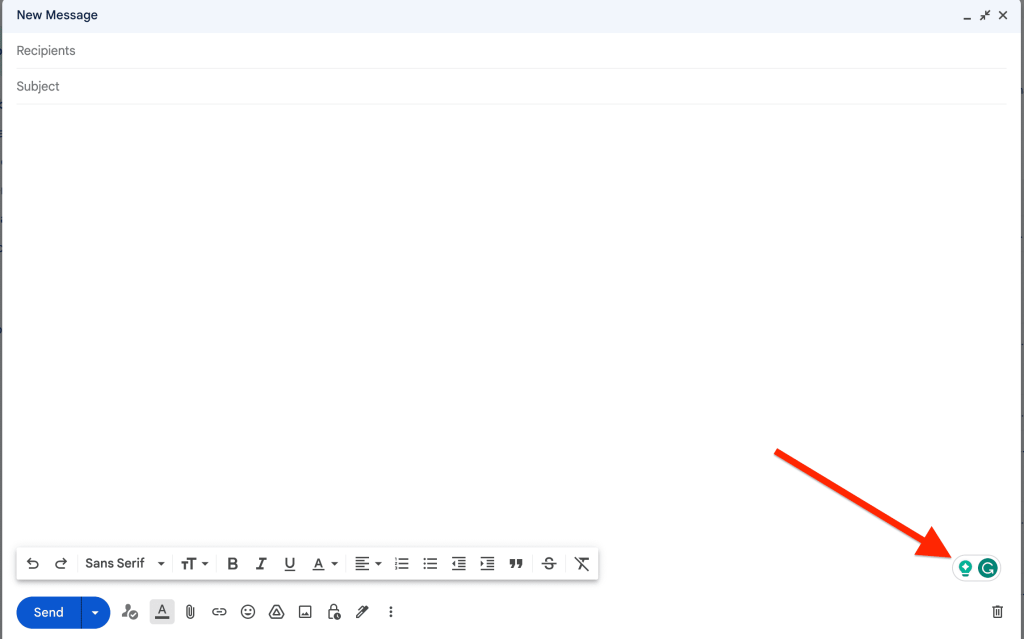
Step 3: When you start typing the body of your mail, you will observe a GREEN button to the bottom right of your compose box.
You will notice the green button will turn red when there are errors in your writing. Here, you can click on the button to correct your mistakes.
Congratulations ! you have successfully Added Grammarly to Gmail. Enjoy writing Error free without any hassle.
Using Grammarly on Gmail (How to Use)
Now that you have added Grammarly to Gmail, let’s help you in using it.
If you are using or have used Grammarly, you won’t have to worry about not understanding its interface on Gmail. This is because Grammarly follows the same UI everywhere.
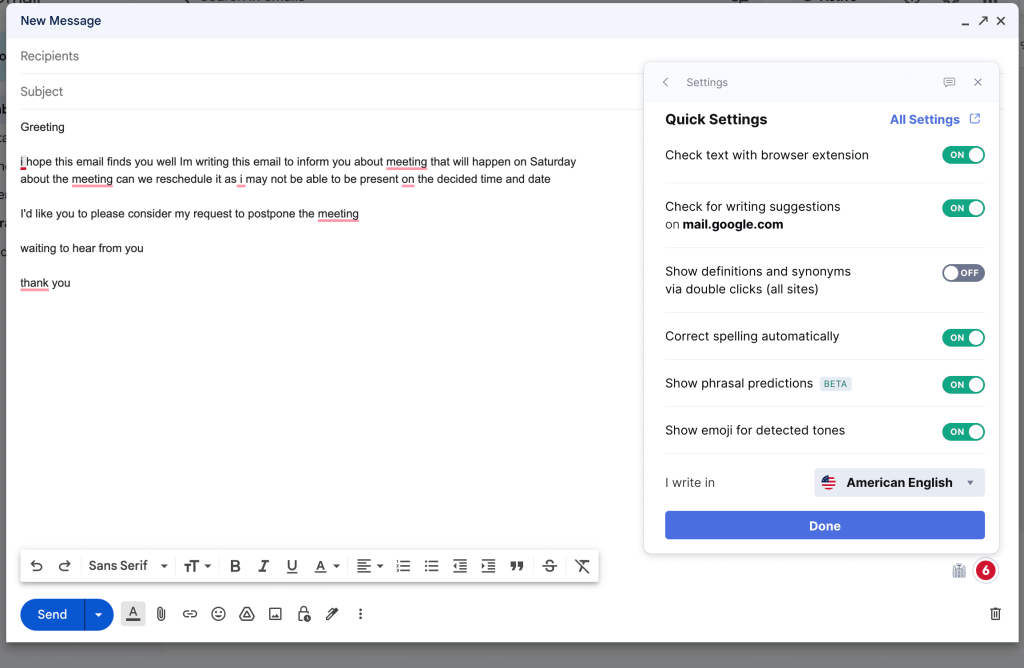
Whenever you are typing, Grammarly will underline the errors. You can tap on the errors and let Grammarly correct them for you. You can also tap on the Grammarly icon at the bottom right.
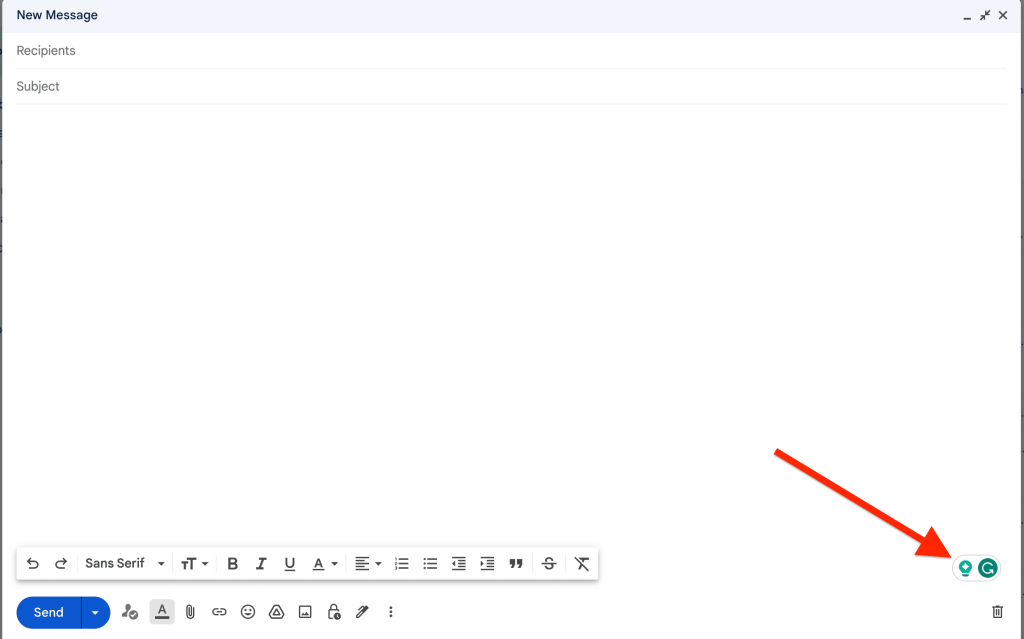
Additionally, if you want to customize the settings, you can tap on the Grammarly icon and then click on the settings option. From here, you can customize the settings as per your needs.
GrammarlyGo On Gmail (How to Use)
Grammarly took a step forward with the introduction of its AI Writing tool -GrammarlyGO. Announced in April, the feature allows users to generate content from scratch. For example, you can ask GrammarlyGO to write content for you.
Besides, you can use GrammarlyGO directly on Gmail. To enable GrammarlyGO, make sure you have signed in to your account.
When you are generating or responding to emails, you will see the ‘bulb’ icon next to Grammarly.
Now, you can ask GrammarlyGO to generate emails for you. For example, I asked GrammarlyGO to create an email with a prompt, “Generate a formal email to postpone the meeting.”
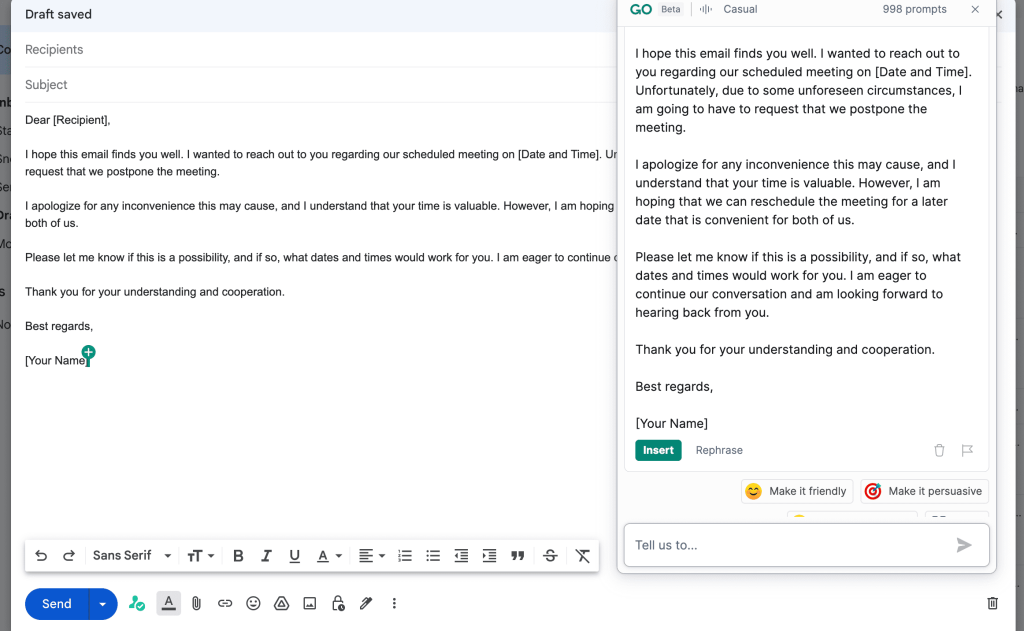
GrammarlyGO will save you time and also make replying and generating emails less hassle. You can use GrammarlyGO with the free and the premium version. However, the premium version gives you up to 1,000 prompts and better customization options.
Is Grammarly for Gmail Free?
Yes! You can use Grammarly on Gmail for free with your free version. You will also get access to GrammarlyGO, but the features will be restricted. You can take advantage of all of Grammarly’s features by opting for Grammarly Premium.
Grammarly Premium starts at $12/month if you opt for the annual plan. You can read complete Grammarly pricing here to explore other plans.
Besides, if you are confused between the free and premium versions, read our Grammarly Free vs Premium comparison to understand which version is right for you.
Bonus: If you want to opt for Grammarly Premium, you can grab it at a discounted price. Check out our Grammarly discount today and grab the plan at a 20% discount.
Related Reads:
Wrapping Up! How to Add Grammarly to Gmail (2025)
If you don’t use Gmail frequently, Grammarly free will do the basic work for you. On the other hand, if you are a working professional and spend most of your time on Gmail, you can opt for Grammarly Premium!
Either way, you can enjoy Grammarly on Gmail using the Chrome extension on your desktop and through Grammarly mobile app on your Gmail app (for mobile).
FAQs
Why is Grammarly not showing in Gmail?
Sometimes, the extension turns off by itself. To solve the problem, you will have to ensure that the Grammarly Extension is turned on by checking it in the extension list of your browser.
Does Grammarly work on emails?
Yes. Grammarly works on emails. Once you install Grammarly for chrome and enable the extension, it will work with emails too.
Can I turn Grammarly on and off?
Yes, you can turn Grammarly on and off by using the toggle button in the settings of Grammarly for the chrome extension.
- Mindvalley Membership Discount → $299 Promo Offer - March 15, 2024
- Top 15 Scholarship Interview Questions of 2025 - March 14, 2024
- How Many Teachers In The US 2025 (Latest Data) - March 9, 2024